How to install Padideban
Step-by-step online setup, with the 14-day free trial or a purchased license code.
In this article
The Padideban installer is small and works online: it downloads the latest version from the server, checks its digital signature, and installs it. The whole process usually takes less than a minute.
1. Download and run the installer
- Use the Free download button at the top of this site to get the setup file.
- Run the file. Windows asks for administrator permission; allow it.
- The “Padideban Setup” window opens. The three tabs at the top, “License”, “Download” and “Install”, show which step you’re on.
2. Choose a license type
On the “License” tab, choose one of the two options:

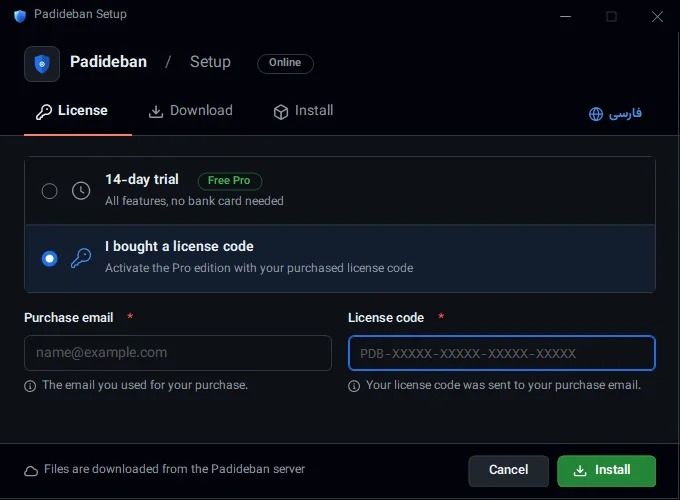
- “14-day trial”
- All Pro features, free of charge. Just enter your “Email”; the trial is registered with that address. After 14 days, free basic protection continues.
- “I bought a license code”
- In “Purchase email”, enter the email you used to buy, and in “License code”, enter the code that was sent to that email. The code looks like
PDB-XXXXX-XXXXX-XXXXX-XXXXX. When you type or paste it, capital letters and hyphens are fixed automatically.
3. Download and install
Click “Install”. The installer goes through four steps one by one and checks each off:
- “Connect to server”
- “Download files”, with the download speed and amount downloaded.
- “Verify digital signature”, which makes sure the downloaded file is the official, unmodified version.
- “Install protection service”
If you click “Cancel” partway through or your internet connection drops, the download resumes from where it stopped next time. You don’t have to start over.
4. Finish setup
When you see “Padideban is installed”, all four steps are done. Below it, setup confirms that your license or trial is active.
Leave “Launch Padideban” checked and click “Finish”. From now on, Padideban starts with Windows, and a “Padideban” shortcut is in the Start menu.